

Azure SQL Single Database is a fully managed, database-as-a-service in the Microsoft Azure Cloud.
This service is always running the latest SQL Engine, never require patches or updating and can be deployed in minutes.
When configured using the "Serverless" Compute Tier, the database can even scale and pause automatically based on workload.
It is an ideal solution for most cloud-based data warehouses utilizing fewer than billion row tables and requiring less than several terabytes of storage.
In this article you will learn how to:
Configure an Azure SQL Database
Create an Azure SQL Database. Using the "Serverless" Compute Tier, the database can even scale and pause automatically based on workload.
Note: There are two common issues when using Serverless tier with TimeXtender:
- Initial Execution may fail when Serverless is set to 0.5 - to fix this issue, set it to be Min 1 vCore. It can be a good idea to enable retires in your execution package with a 2-3 minute delay as well.
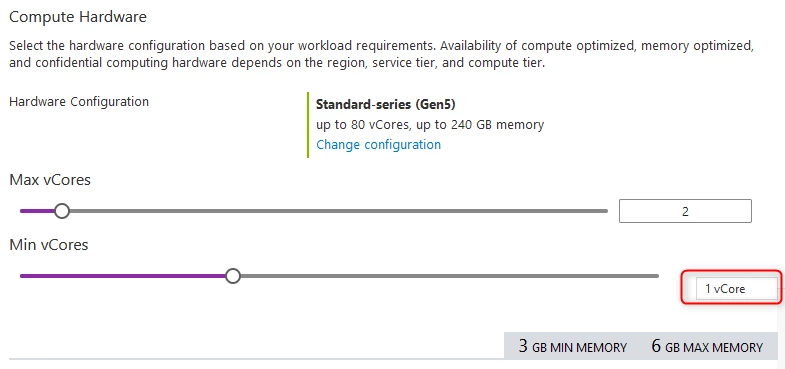
- Repeat executions may fail when serverless is scaling. This is because the processing speed at lower vCores is still too slow. To fix it, ensure the Min vCores is raised to a reasonable limit, or very close to the Max vCores.
Configure SQL users & Permissions
You will need to create users in Azure SQL Database with the necessary permissions. Alternatively, you can use Azure Active Directory.
Setup a ODX Instance to use a shared Azure SQL Database
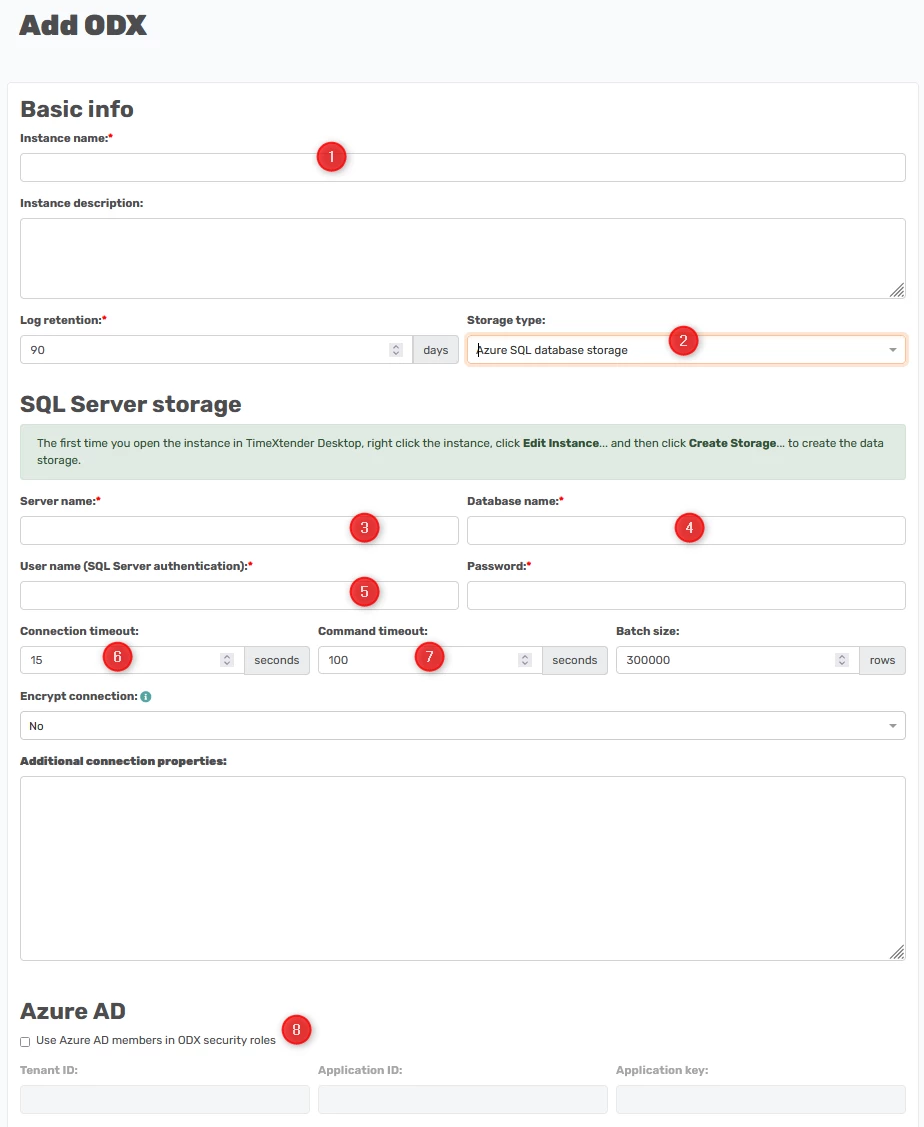
- Give the ODX Instance a name
- Change the Storage type to Azure SQL database storage
- Add the Server name.
- Add the name of your Azure SQL Database created in previous steps.
- Add a SQL Server Authentication user name and the password of this.
- Set the Connection timeout to 60 or 120.
- Set the Command timeout to 1800 or 3600. That is 30 minutes or an hour.
- If you want Azure AD members to be located in the security setup turn on this checkbox.
- Add the company's Tenant id. Find Tenant ID
- Add an Application Client ID in the Application ID.
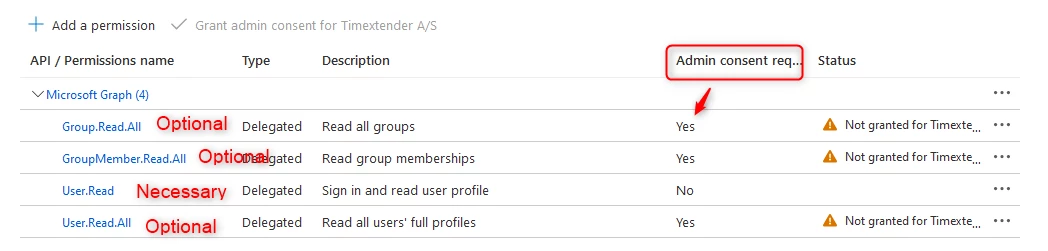
The basic rights are enough, but for full access you will need the ones requiring Admin Consent.
- Add the Secret key of the App you have created.
Setup a Data Warehouse instance in a shared Azure SQL Database
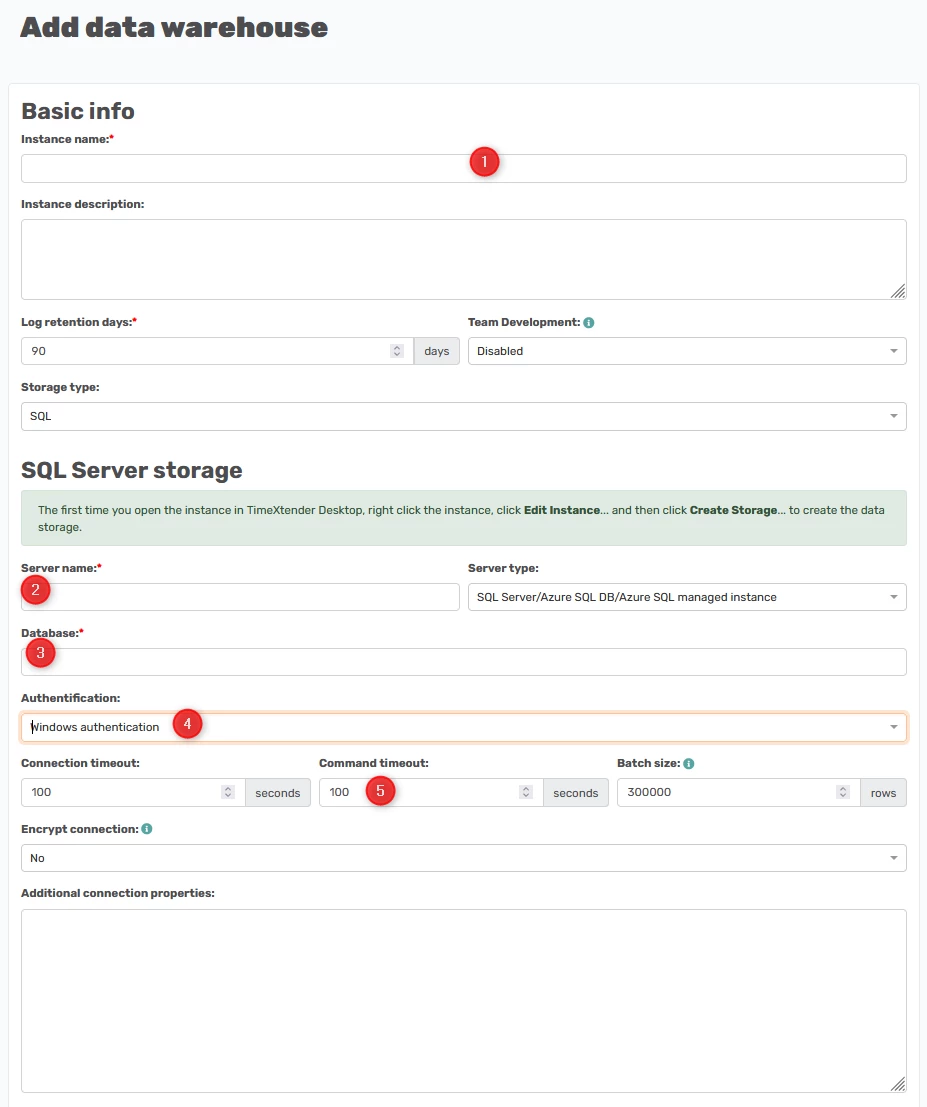
- Add the instance name you want the DWH instance to have
- Add the server name.
- Add the name of your Azure SQL Database created in previous steps.
- Set Authentication to SQL Server authentication and add the user and password for this.

- Set the Command timeout to a higher value such as 1800 equal 30 minutes.
Once this is saved you can connect to it in TimeXtender.
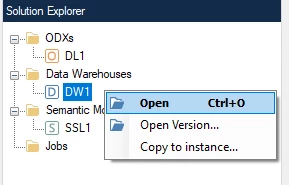
To use it click on the instance and open it.
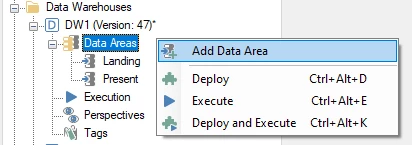
When it is open you can add Data Areas. Each area will automatically use the name you give the area as the schema, but otherwise it will share the same database. It will also automatically use Direct Read between these.
Allow read access to the Database
The first step in the process is to give admin privileges to the user making the initial changes.
- Identify the SQL Server instance in your resource group where the database is.
- Inside the instance click on the Azure Active Directory in the settings tab.
- To set your user as the admin click on the Set admin option-> Search and select the name in the dialogue box.
- In your SSMS Login to the Azure SQL as the Azure Active Directory admin specified above
- Run the below script in SSMS in the same instance-
- CREATE USER [Azure AD Group Name] FROM EXTERNAL PROVIDER;
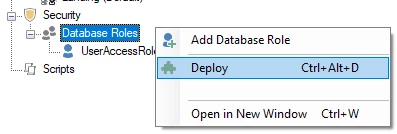
- In TimeXtender desktop application where the Azure SQL DB, expand Security right click on the Database Role to Add: Add Database Role ➡ Add Manually ➡ Enter the same AD Group Name used in the SSMS
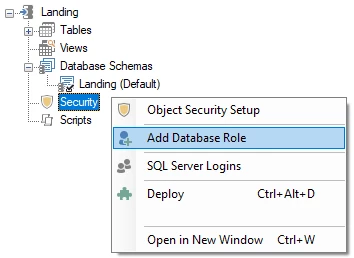
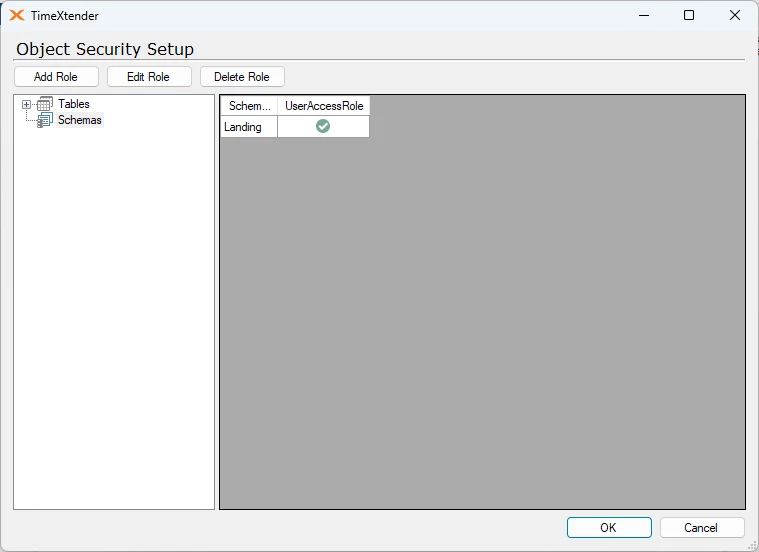
- To Provide the users in the Group access to only the valid schemas, right click Database Roles ➡ Object Security Setup ➡ Click on Schemas and check UserAccessRole to the valid schema
- Deploy the security tab


Optionally, to give the users read access to all the tables in the database, run the below script in SSMS
EXEC sp_addrolemember 'db_datareader', ‘AD Azure Group’;